

The User Management feature displays the names of all the users along with their e-mail IDs & access information with icons for current status. Clicking on a user allows Admin to edit further details.
- Only users with Admin rights can change the rights of other users.
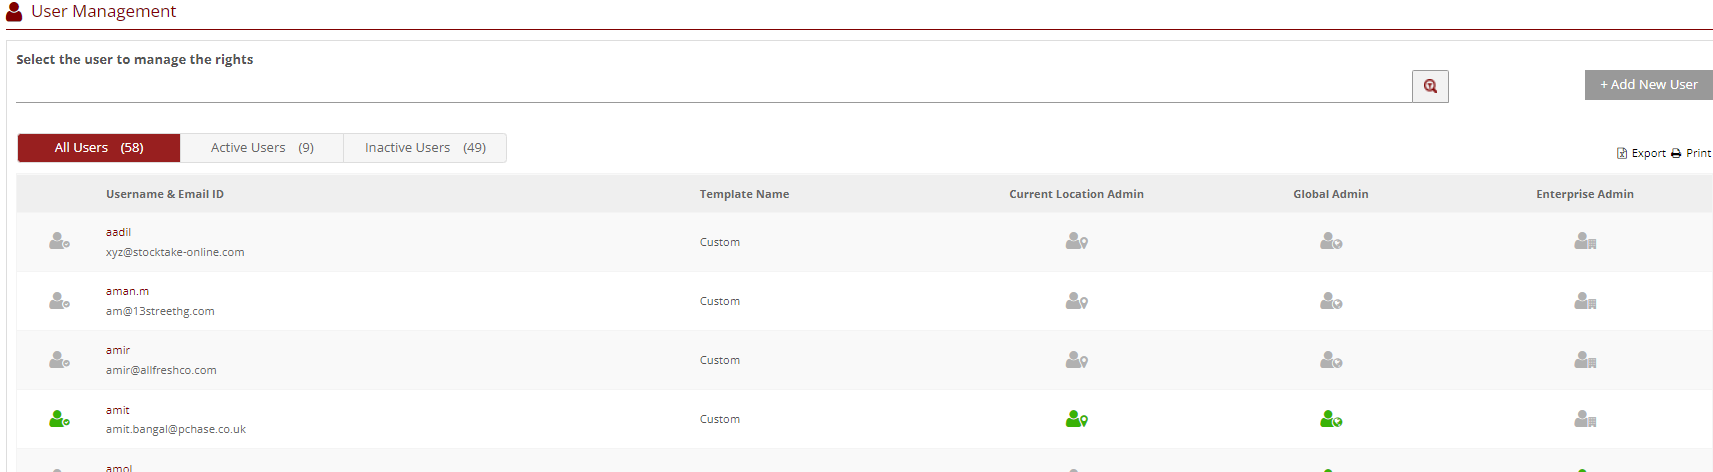
- Select the user or use the search bar to find them.
- All Users will display the list of all the added users. Active Users will display the list of currently active users on the system & Inactive Users will display the list of all the currently inactive users.
- User information under each tab includes:
- Username & Email ID
- Template Name - the User Rights Template assigned to this user
- Current Location Admin - whether this user has Admin rights for the current location
- Global Admin - whether this user had Admin rights for ALL Locations
- Enterprise Admin - whether this user has access to the Enterprise location
-
User Status - whether this user is active or not
- Grey icons indicate Inactive while Green icons indicate Active.
- Click on a username to view their individual details.

- Here you can:
- Update a user's Email Address
- Reset their password
- Activate / Deactivate the user
- Change rights / template
- Category Rights dictates which categories that user is able to access in that location
- Locations Rights dictates which locations that user has access to and whether that user is an Admin.
- You can also set up Daily Notifications from here.
- Global Rights contains the options for Global Allocation and access to the Enterprise location.
- Templates Rights displays the User Rights Template assigned to this user. It can be changed here, or a Custom Template can be assigned and individual rights allocated.
Create New User
- Click on the + Add New User button on the right.
- The User Creation menu will display:

- Enter a User Name (Alphanumeric characters only)
- Enter an Email Address

- Click on Add.
- Next you will be presented with the User Rights page.

- Now you can select the various rights for this user.
- Category Rights

- Location Rights

- Global Rights

- Template Rights

- All users will be set to a Custom Template by default however, managed template rights can be created by the STO team upon request.
Reset Password
- To reset the password for any active user, click on the respective username and then the Reset Password option. Credentials will be received at the added email id.
Once logged in with the system-sent credentials, the password can be changed anytime.
0 Comments